Optical Property Meters
EXPRESSING COLORS NUMERICALLY WITH SUGA BRAND METERS
As accurate expression of color with numerical values has become a necessity. Shinyei Corporation of America offers advanced color meters, haze meters and image clarity meters from SUGA Test Chambers (Instruments) to contribute to the precise color management in a lot of different industries.
Color Meters
The Importance of Color Meters
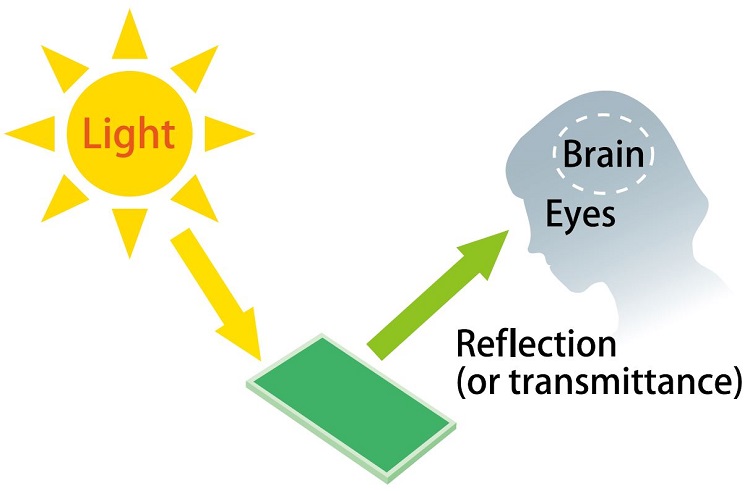
We humans sense color by receiving light reflected off objects with our eyes. The information is then sent to the brain and processed as color.
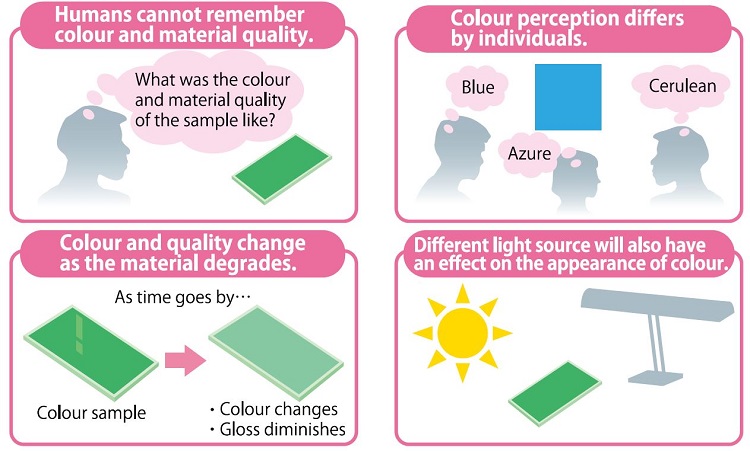

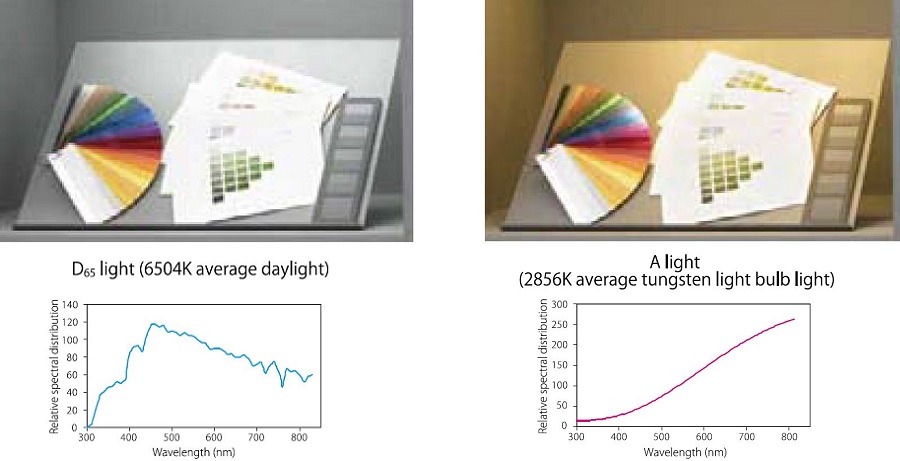
Light Source
Same samples observed under different light sources.
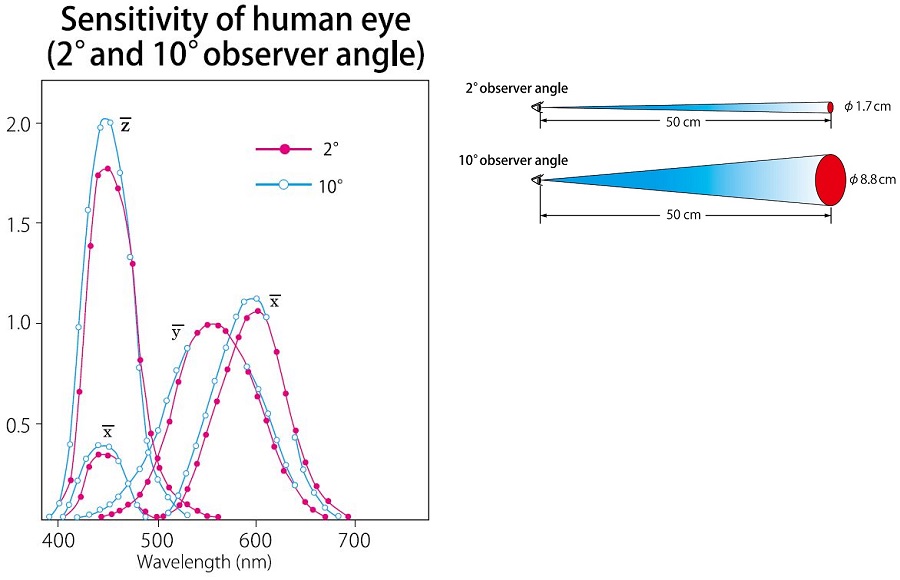
Observer Angle
How to express color ?
Munsell Color System
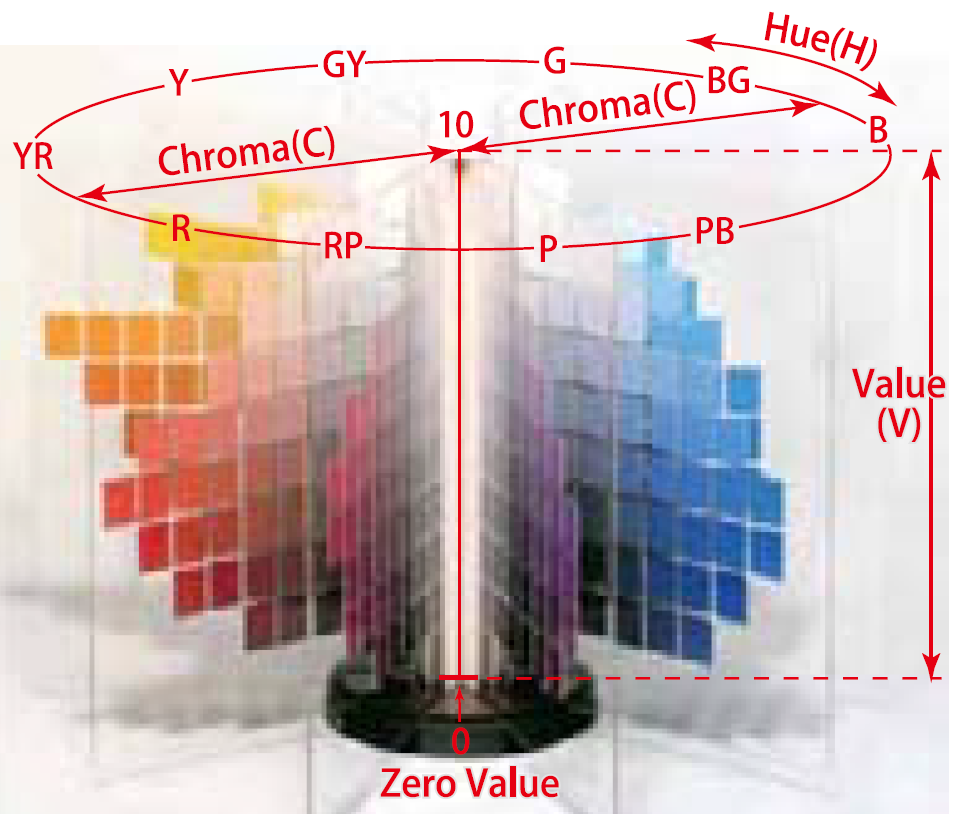
Munsell Color System is a chart where color is expresses in three dimensions:
hue, value (lightness), and chroma (color purity).
Hue is expressed in horizontal circle in the order of red, yellow, green, blue, and purple.
Value (lightness) is expresses by the height of the central axis, where the highest value 10 represents complete whiteness, and 0 represents complete blackness.
Chroma (color purity) is measured radically from the central axis outward, where the value increases as it becomes further from the axis.
Expression: H V/C = Hue Value / Chroma
CIE XYZ
The chromaticity diagram, expressed in values x, y and Y, is the basic form of color expression, which was produced by CIE in 1931.
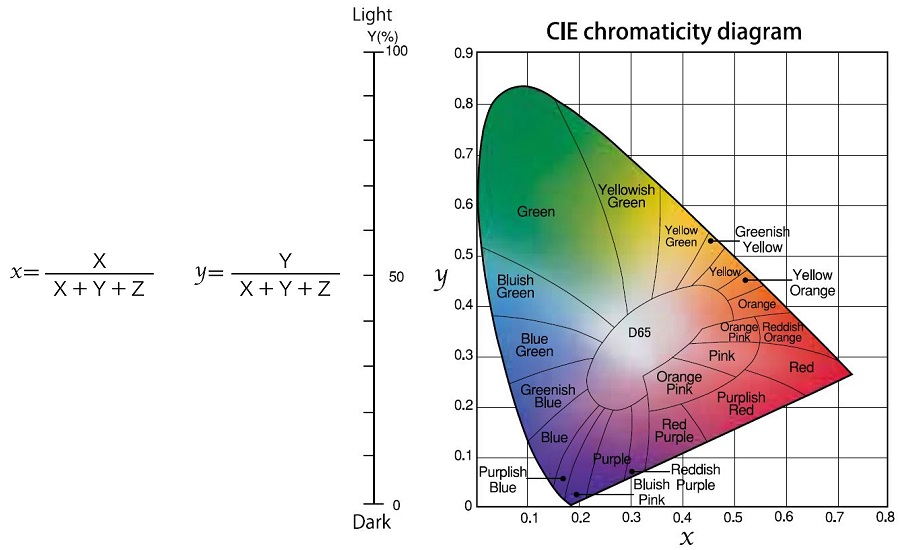
The chromaticity is determined by the point on the diagram which coordination corresponds to the values x and y determined by the above formula.
Y indicates the lightness: 0% represents complete black, and 100% represents complete white.
CIE LAB
CIE LAB, also known as LAB color space, is a color diagram recommended by CIE in 1976, which is disigned to approximate human vision.
It is a rectangular coordinate system composed of a* and b* axis, with the vertical L* axis indicating the lightness.
It is used to display color and determine color difference.
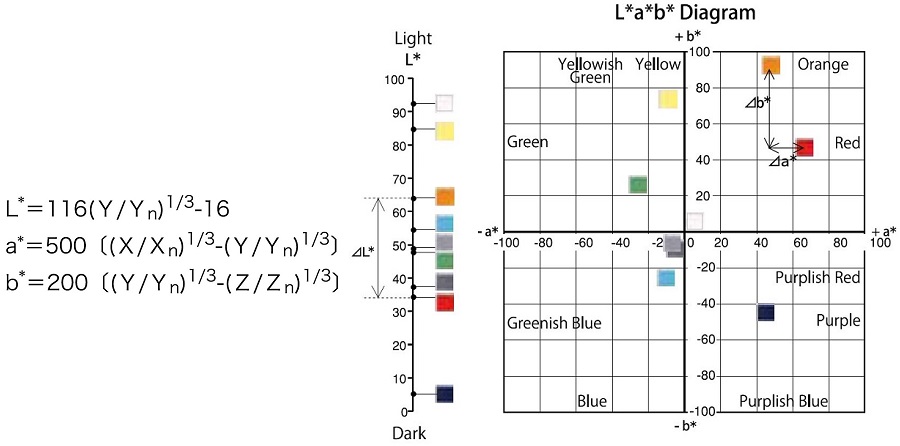
Xn, Yn, Zn: the tristimulus values of the absolute diffuse reflector of the observer angle for each light source.
Color Difference Formula

This formula indicates the color difference between red and orange in the L*a*b* Diagram
Measurement samples: CCS Series Ⅱ (CERAMIC COLOR STANDARDS-SERIES Ⅱ)

There are also many other color systems used for different purposes.
CC-mPOTABLE SPECTROCOLORIMETER
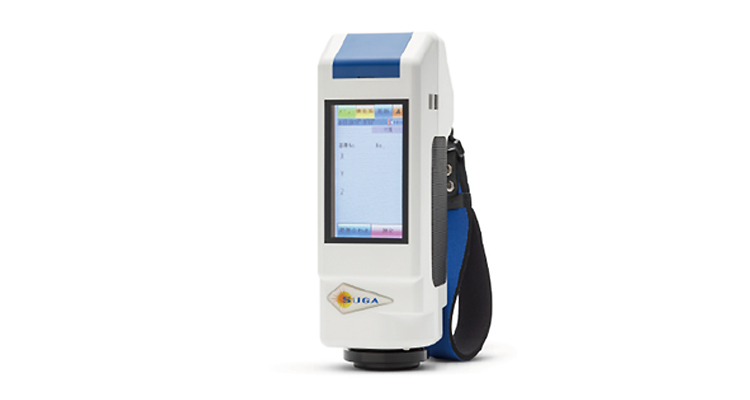
Its large color LCD touch panel maltes it easy to read, prevents mistakes and reduces fatigue.
The light source is SUGA's distinctive VI-LED (Hight color-rendering index white LED) with long lifspan and light suitable for color measurement. Its dual synchro sensor method with two spectroscopes gives it an outstanding long-term stability.
| Geometry | Diffuse light source 8 degree ovserver angle (switchable) reflectance measurement |
| Measurement aperture diameters | 10mm, 5mm |
| Photometry | Dual synchro sensor method |
| Wavelength range | 400 - 700 nm, 19 nm inverval |
| Light source | VI-LED ( High color-rending index white LED) |
| Dimension | W82mm x D112mm x H249mm approx. 980g |
CC-iTRISTIMULUS COLORIMETER
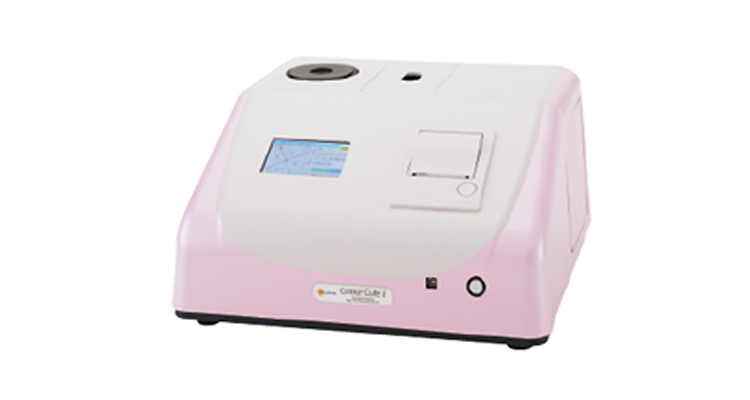
Striving for the highest stability, operatable and cost performance of its class
'Color Cut i'' is an all-in-one photoelectric trisimulus color meter, capable of measuring both reflectance and transmittance.
* CE model is also available
| Color measurement conditions | C light with 2 degree view angle / D65 light with 10 degree view angle / D65 light with 2 degree view angle |
| Geometry | Reflectometry 8 degree incident diffused light viewing Transmission 0 degree diffused light viewing |
| Photometry | TM double beam method (photoelectric tristimulus colorimetry) |
| Aperture diameter | Reflection: ϕ30mm, ϕ15mm, ϕ5mm Transmittance: ϕ30mm |
| Dimension | W43cm x D39mm x H23cm approx. 12.5kg |
SC-T / SC-T45 SPECTROCOLORIMETER
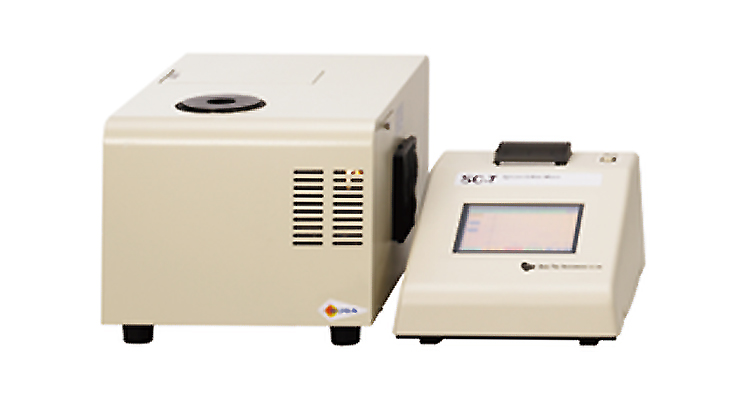
Integrated sphere method and 45° incidence 0° viewing method
Valued in the fields of precise color management, the SC series is our high-end model with the highest accuracy of its class, along with variety of measurement and graph display options. This single unit can measure both reflection and transmittance.
| Color measurement conditions | 2° and 10° view angle of A, C, D65, F6, F8, F10 and F11 lights |
| Geometry | Reflectometry: 8° viewing (swithchable) Transmittance: 0° incident 0° viewing |
| Measurement wavelength interval | 380 to 780 nm, 5nm interval |
| Photometry | Total wavelength measurement method (TM double beam) |
| Spectroscopy | Reflection range |
| Aperture diameter | Reflection: ϕ30mm, ϕ15mm, ϕ5mm Transmittance: ϕ30mm |
| Dimension | Optical unit: W27 x D42 x H23 cm approx. 15kg Measurement unit: W23 x D33 x H16 cm approx 4kg |
Gloss Meters
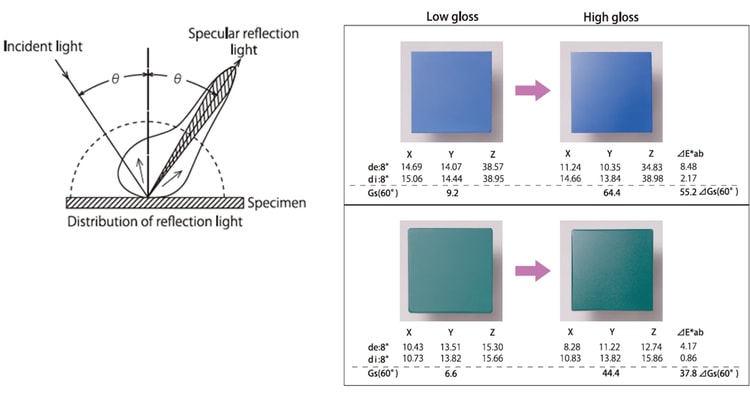
Gloss (specular glossiness) is a value that indicates the intensity of the specular reflection of the surface of an object. High gloss will indicate that the reflected light is intense.
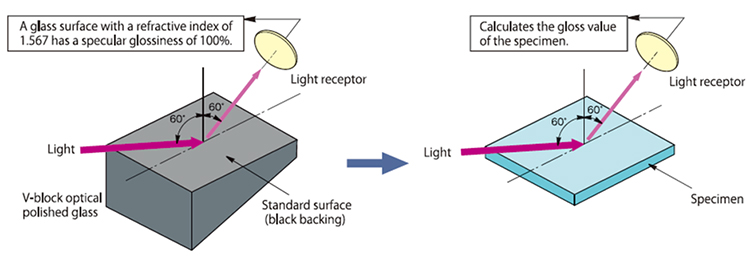
Although color will appear differently depending on the intensity of the gloss, the color value between high and low gloss specimens may not be so different depending on the color meter's geometry. For this reason, gloss should be measured along with color.
GM-1 GLOSS MOBILE
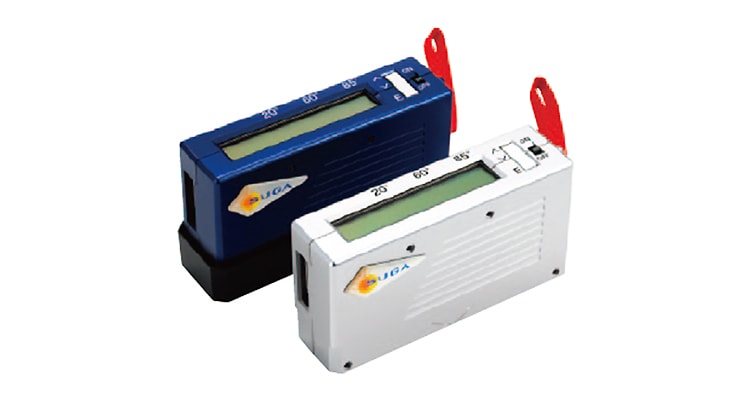
A mobile gloss meter capable of simultaneous three-angle measurement
This mobile meter is capable of measuring the specular gloss from three angles ( 20°, 60° and 85° ) with a touch of a button, this is an ideal chamber (instrument) for field measurement.
| Measurement angles | 20°, 60°, 85° |
| Statistical processing | Mean of up to 99 reading plus standard deviation |
| Data storage | Up to 1,000 readings |
| Tolerance | Standard deviation of ⊿Gs within 0.5 (after 10 measurements of gloss calibration standard plate) |
| Approximate dimension and weight | Within 15cm, depth 4cm, height 8cm (wight: 500g) |
GS SERIESMULTI-ANGLE GLOSS METER
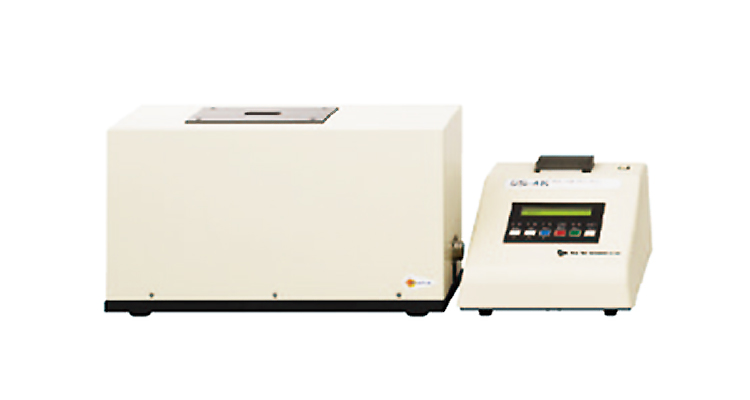
Fixed - angle gloss meters that provide accurate angle setting
Up to 4 higly precise, fixed measurement angles can be selected from 20°, 45° 60°, 75° and 85° (75° and 85° cannot be selecfted together). It can measure specimens of large size with its flat measurement surface. Measurement value can be displayed simply by placing the specimen on the stage. The TAPPI covering beam method (20°, 75°) is also available.
| Models | GS-1K(1 angle), GS-2K(2 angle), GS-3K(3 angle), GS-4K(4 angle) |
| Measurement angles (fixed) | Up to 4 angles from 20°,45°,60°,75° and 85° (75° and 85° cannot be selected together) |
| Statistical processing | Mean of up to 99 reading plus standard deviation |
| Data storage | Up to 1,000 readings |
| Tolerance | Standard deviation of ⊿Gs within 0.1 (after 10 measurements of gloss calibration standard plate) |
| Approximate dimension and weight | Optical unit: width 44cm, depth 17.5cm, height 24cm(wight: 9kg) Measurement unit: width: 23cm, depth 33cm, height 14cm(weight: 4kg) |
UGV-6P VARIABLE - ANGLE GLOSS METER
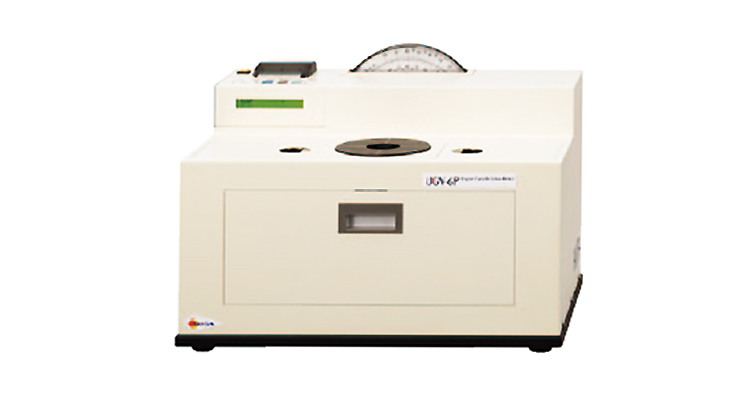
Complete gloss measurement with one meter
The incidence angle and the receptor angle can be adjusted individually by 1° margin using the meter at the center of the chamber (instrument).
A marker is included at the center for pricise angle setup. The measurement value is displayed simly by placing the specimen on the specimen stage.
| Measurement angle range | Oncidence from 20° to 85°, receptor from 0° to 85° (Incidence + receptor must be over 30°) |
| Aperture diameter | Φ45mm (Φ8mm optinal) |
| Statistical processing | Mean of up to 99 reading plus standard deviation |
| Data storage | Up to 1,000 readings |
| Tolerance | Standard deviation of ⊿Gs within 0.1 (after 10 measurements of gloss calibration standard plate) |
| Approximate dimension and weight | Width 51cm, depth 37cm, height 36cm(weight: 15kg) |
Haze Meters
Haze is the level of fogging used to measure the level of translucency of materials such as glass and plastics. Materials that are totally transparent will have a haze value of 0; this value will increase as the material becomes foggier.
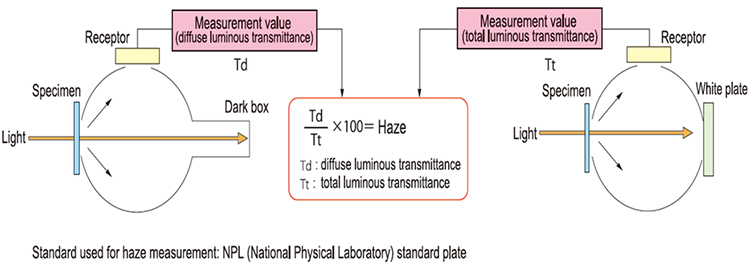
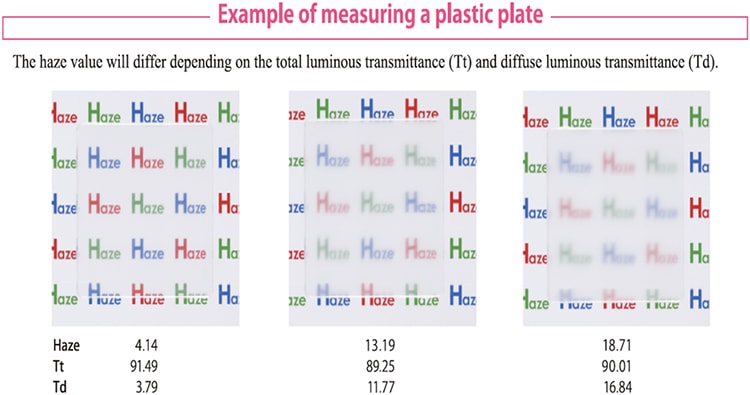
Total Luminous Transmittance (Tt)
Total Luminous Transmittance (Tt) is an essential measurement item for haze measurement, and is one of the important optical properties of transparent materials.
In order to obtain the same value as the Total Luminous Transmittance value of the calibrated spectrophotometer, it is necessary to match the light receiver used for the haze meter to the sensitivity of human eye.
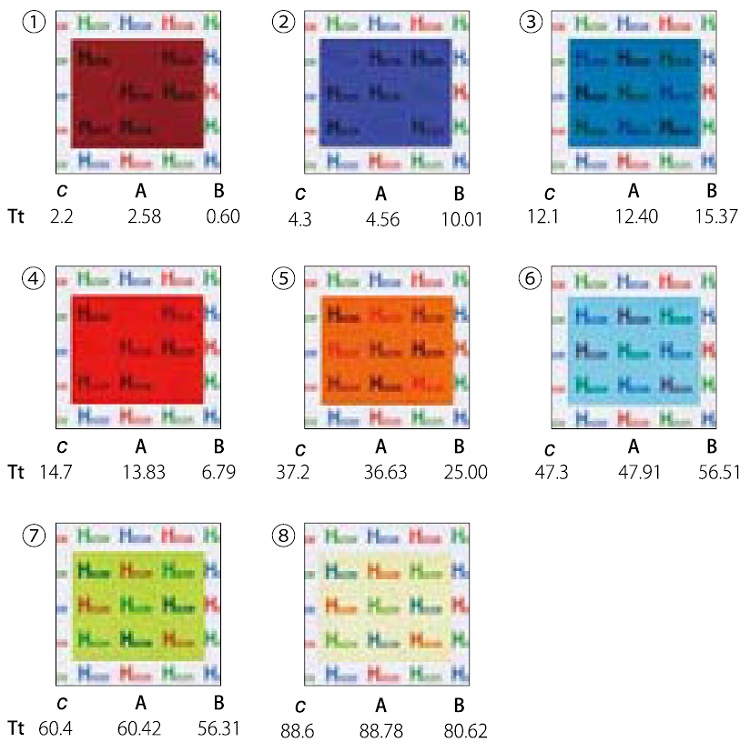
| c | Standard value calibrated with a spectrophotometer |
| A | Value measured by Suga Test Chambers's (Instruments's) Haze Meter |
| B | Value measured by a Haze Meter which is not in compliance with human vision / luminous efficiency. |
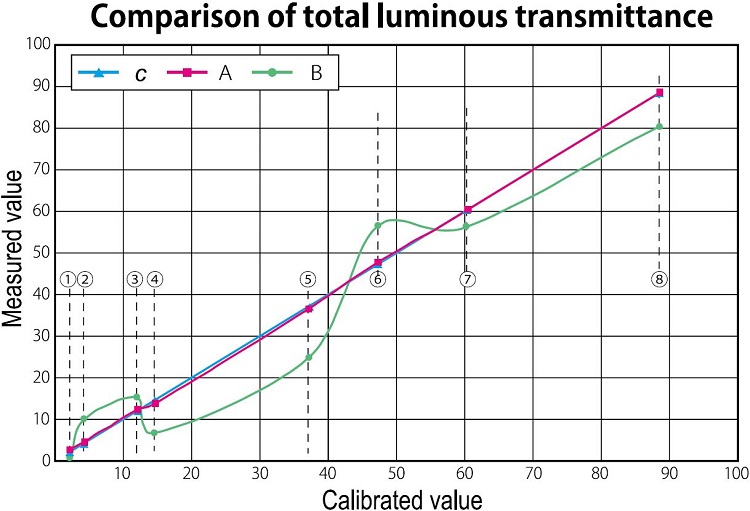
The colored glass filter's haze value calibrated with the transmittance read from a spectrophotometer, and the value A (Suga Test Chambers's (Instruments's) haze meter) have similar measurement results.
Correctly calibrated haze meter will not be affected by the specimen's color.
Haze MetersHZ-V3
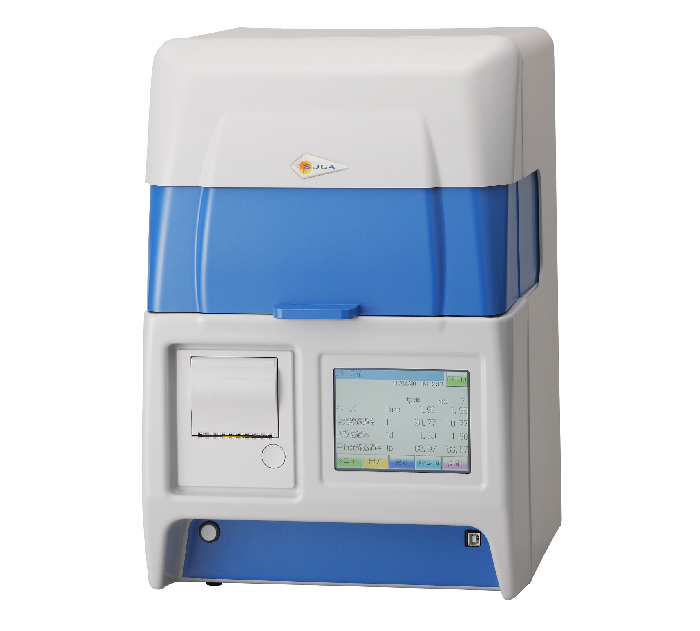
Haze Meter is an chamber (instrument) that measures an object’s haze value, which is the ratio of total light versus diffused light that passes through an object. A totally translucent material will have a haze value of 0, and the value will increase as the amount of diffused light increases (making the light appear foggier).
Haze MetersHZ-V4 NEW
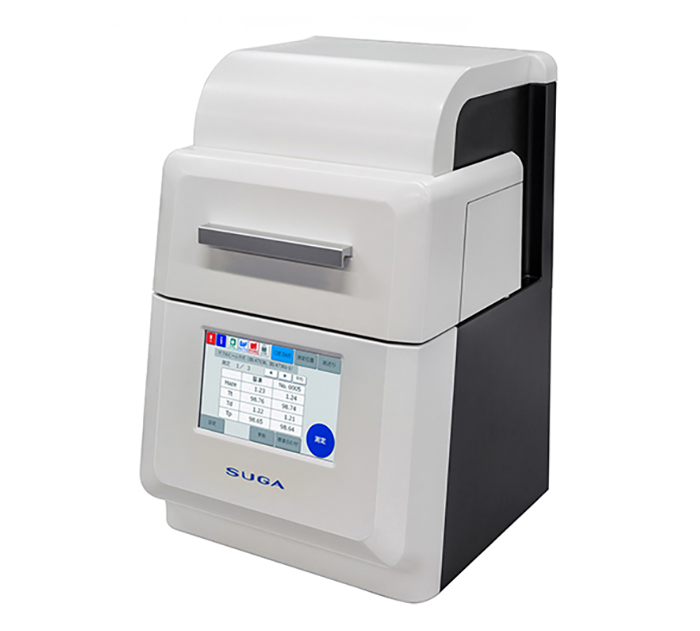
Haze meter redesigned for workability. It measures the degree of fogging (degree of transparency) of glass, plastics, liquids, etc. The 90 mm wide door opening for ease of operation, a large chamber, and a highly visible operation screen make it even easier to use.
Image Clarity Meters
Image Clarity Meters
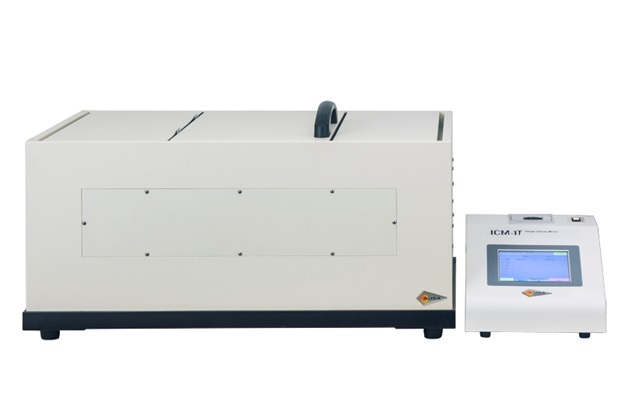
Image Clarity Meters are used to determine the optical effect of test specimen’s surface structure on color appearance properties. Surface structure effects includes optical phenomenon as clarity, DOI and orange peel.
Reflectance / Transmittance Meters and Others
Reflectance / Transmittance Meters and Others
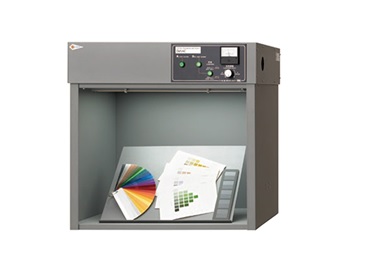
A diverse product line of chambers (instruments) to assess many different optical properties of specimens. These products include assessing color appearance analysis of surface reflection and transmission modalities. They are applicable throughout the color supply chain.
